Create a PBX extension is easy in myPBX and it’s the first step to being able to connect your IP Phone, Softphone or device to your PBX and start receiving calls.
This tutorial explains step by step approach on how to create an extension in myPBX Control Panel.
Each user you’ve ordered at myPBX is a phone extension.
How do I create an extension in myPBX?
Login to myPBX Control Panel and follow this steps.
Step 1 – Click on Settings
On the dashboard click on settings in the navigation bar.
Step 2 – Go to Set Phone Extensions
Once you click, a set of new links are displayed below, click on Set Phone Extensions
Step 3 – Click on Proceed
A message warning that this type of configuration may affect your PBX will be displayed, click on Proceed.
Step 4 – Click Add
Now you’re at the Set Phone Extensions section, click on the Add Button.
If you don’t have more available phone extensions, contact us to acquire more users.
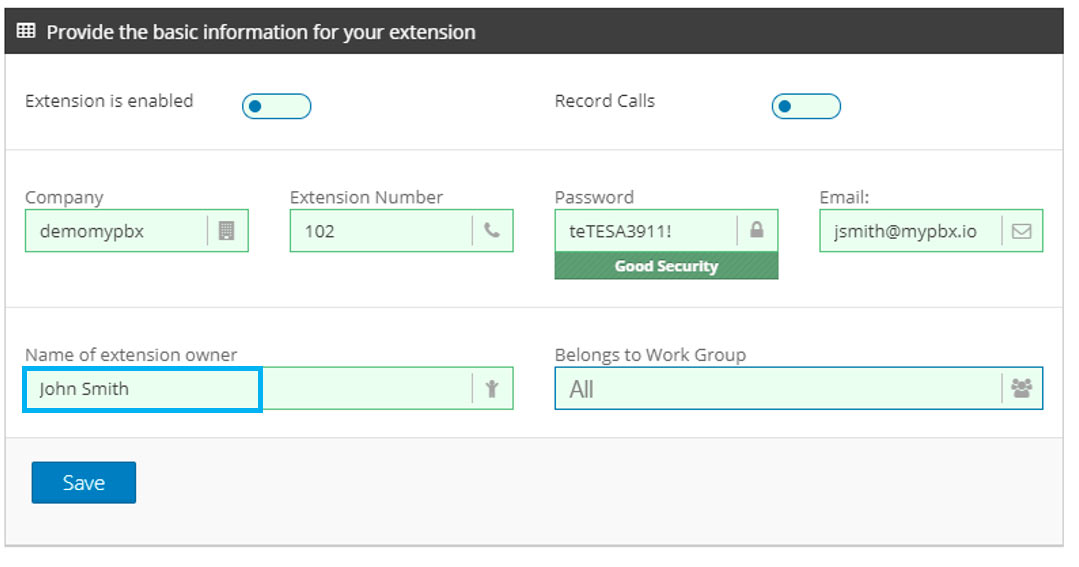
Step 5 – Write the extension number
Type a 3 digit extension number; you can’t have two extensions with the same number.
Step 6 – Write the password
Type the phone extension password and the system will guide you to create a secure password with special characters, upper and lower case letters and numbers. This password will be used afterwards to configure the phone extension on your device.
Step 7 – Write the user email
Type a valid email address that belongs to the person using that extension. The email address can be used to receive its voicemail messages by email message.
Step 8 – Write the Name of the Extension Owner
The last field that needs to be completed is the name of the person or department (or some name that helps you identify this extension).
This name will be displayed when calling other extensions and also in the PBX Statistics Reports.
Step 9 – Save
If everything looks green and correct, it’s time to hit the Save Button
Great! you are done; your new extension will be displayed on the extensions list, you can edit the extension clicking on it.


